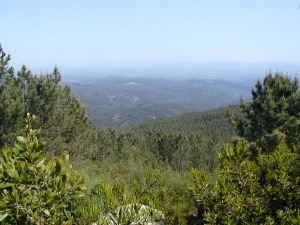
Faced with the likelihood of a renewed French invasion of Portugal from Spain in 1810, Wellington deployed the 1st, 3rd, 4th and Light Divisions to guard the most northern and most likely invasion route through Ciudad Rodrigo and Almeida. The task of covering two other possible invasion routes, through Castelo Branco and through Badajoz and Elvas, was largely entrusted to Hill's 2nd Division. Having fed in excess of 300,000 troops into Spain by the spring of 1810, Napoleon charged Marshal André Masséna with the task of retaking Portugal. On 30th May, Ciudad Rodrigo came under siege from the French. Wellington rode out much criticism by refusing to risk his army in an attempt to break the siege which ended with the garrison's surrender on 10th July. Almeida fell abruptly to the French on 28th August after the fortress town's main magazine blew up. Masséna now pressed on towards Coimbra at the head of 65,000 men. Ahead of him lay the Buçaco ridge, where Wellington had already prepared to make a stand with 51,000 British and Portuguese troops. Wellington's preparations for a defensive battle along the line of the Buçaco ridge had extended as far as the construction of a lateral communications road behind the crest. Although Wellington's forces were concentrated at the likely points of attack within the northern half of the 16km-long ridge, the communications road allowed troops to be moved quickly from one point to another. On 26th September, Masséna's army deployed below the ridge with Ney's Corps on the right, Junot's Corps in the centre and Reynier's Corps on the left. The lowest part of the ridge was crossed by a minor road from Santo António do Cântaro to Palheiros, and it was here where Wellington expected the French to strike first. At daybreak on the 27th, Wellington positioned himself above the Palheiros road. Although the valley floor and the lower slopes of the ridge were shrouded in mist, the enemy could clearly be heard moving.
The enemy movements were those of Reynier's Corps; 15 battalions of Heudelet's Division were advancing along the Palheiros road while 11 battalions of Merle's Division were moving forward north of the road. Picton's 3rd Division would take the brunt of Reynier's attack. The first of the French to come into action were four battalions in column at the head of Heudelet's Division; emerging from the mist, they were brought to a standstill by fire from the 1/74th and Portuguese 21st, supported by artillery. Picton now moved ½ of the 1/45th and two battalions of the Portuguese 8th to plug a gap around 1.2km to the north which Merle's Division was threatening to exploit. The head of Merle's Division reached the crest of the ridge to find it momentarily undefended before the timely arrival of British and Portuguese infantry; the French column came under rolling fire from the Portuguese 8th before being charged in the flank by the 1/88th and the ½ 1/45th. At the same time, Wellington himself had ordered two 6-pounder cannon to be brought to bear on the right flank of Merle's Division which was still struggling up the hillside. The attack disintegrated completely as Merle's leading battalions were thrown back onto the hillside by the shock of the British infantry charge.
The third and last of Reynier's attacks, made by 7 battalions of Heudelet's Division led by Foy, was directed just north of the Palheiros road. The remaining sections of Picton's Division were unable to halt the attack, and the head of the French column had reached the summit of the hill before Leith's 5th Division began to arrive on the scene by means of the communications road. The 1/9th opened fire on the flank of the leading French battalions at 100m and continued to fire while advancing. At a distance of 20m, the 1/9th prepared to charge with bayonets, at which point the enemy gave way completely. The fighting in this sector of the battlefield was effectively at an end. Stepping back a little in time, it was on seeing through the dispersing mist Merle's Division approach the crest of the ridge that Ney began his own Corps attack using two divisions - those of Loison (12 battalions) and Marchand (11 battalions) - on either side of the Moura-Buçaco road. On the French right, Loison's Division forced back with difficulty a strong skirmishing line deployed in front of the village of Soula, comprising upwards of 1,300 riflemen of the 1/95th and 3rd Caçadores. On emerging from Sula, the French came under heavy artillery fire and immediately pressed on towards the artillery battery by the windmill on the rocky knoll above them. Loison was completely unaware that two battalions of Crauford's Light Division - the 1/43rd and 1/52nd - were concealed in the ground behind the battery. As the French prepared ro rush the final few yards uphill to the battery, Crauford waved his men forward and "eighteen hundred British bayonets went sparkling over the brow of the hill".1 At a distance of as little as 10 paces, the line of infantry poured a murderous volley into the front of Loison's Division before wheeling in from left and right to generate a semicircle of fire. Within minutes, the French were streaming back down the hillside in a broken mass with Crauford's troops in pursuit. The one battalion of Loison's Division to have escaped this mayhem, having slipped to the left, was thrown back by one battalion of the Portuguese 19th (Coleman's Brigade).
Marchand's Division had braved heavy artillery fire and had pushed aside skirmishers of the 4th Caçadores before coming up against four battalions of the Portuguese 1st and 16th (Pack's Brigade). After seeing Marchand make several unsuccessful assaults up the hillside, Ney called off his attack. Masséna now accepted the futility of making any further attempts to storm the ridge, and ordered his divisions to retire to their camps. French losses on the day amounted to more than 4,600 killed, wounded or taken prisoner. British-Portuguese casualties totalled just 1,252.
During the morning of the 28th, French cavalry discovered a practicable country road to the north of the ridge that would enable Masséna to outflank Wellington's position. By daybreak on the 29th, Wellington had abandoned the ridge, and commenced the withdrawal to the Lines of Torres Vedras.
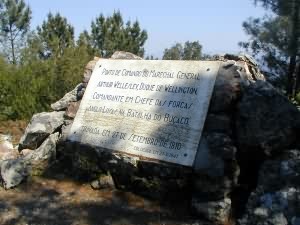
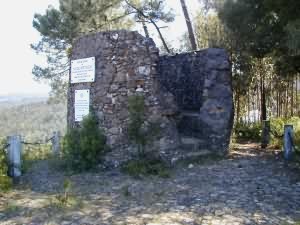
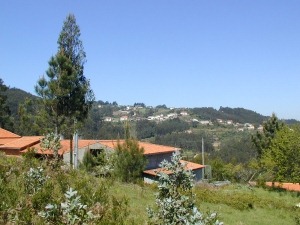
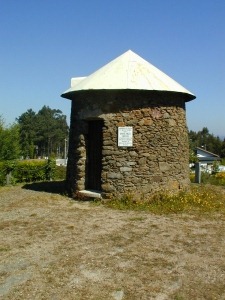
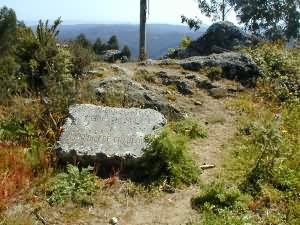
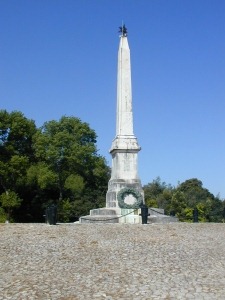
Leave the A1 Lisboa-Porto motorway at the Cantanhede-Mealhada exit (N234). Follow directions to Mealhada, Luso and Buçaco. The road leads into the Buçaco Forest and to the Hotel Palace do Buçaco. (A stop here for a sandwich and a glass of the house red wine is highly recommended. Inside the hotel is a fine azulejo depiction of the battle.) Wellington spent the night after the battle in the adjacent Mosteiro dos Carmelitos, a fact recorded on a plaque by its entrance. Leave the forest following signs to the Museo Militar in Buçaco village. The museum provides a good introduction to the battle and serves as a focal point for visiting the battlefield. From the museum, take the road signposted to Viseu. Immediately on leaving the village, the site of the Sula windmill (Moinho de Sula) can be seen on the left (signposted). To see the battlefield from Masséna's command post at the Moura windmill (Moinho de Moura), continue towards Viseu, turning off right (signposted) 2km from the museum and just before reaching Moura itself. The remains of the windmill are a short distance uphill to the left. Return to the museum. Back at the museum, turn left following signs to "monumento à Batalha do Buçaco". The monument is on the right after 0.5km. The more intrepid visitor can find Wellington's original command post by continuing along the road towards Cruz Alta. 0.4km beyond the monument take the right fork (not signposted). After a further 1.8km, turn left down a rough track. (A signpost carved into stone reads "Posto de Comando Lord Wellington".) At a fork 1km down the track, you may want to take pity on your car and walk the remaining 100m or so down the left fork to find an inscribed stone marking the spot from where Wellington observed the action at Santo António do Cântaro. Return with care! "A History of the Peninsular War, Volume III" by Sir Charles Oman, published by Greenhill Books 1996, ISBN 1853672238. Detailed map of the Battle of Buçaco courtesy of The Napoleon Series. Wellington's dispatch on the Battle of Buçaco courtesy of University of Southampton Libraries. Wellington's Dispatches courtesy of the War Times Journal. Photographs of the battlefield courtesy of The Portsmouth Napoleonic Society. © Andrew C Jackson 2003
|